ATTENTION FAMILY MEMBERS!! It is advised - unless you want to spoil the suprise please do not view this blog until after Christmas!!! Even though I have not mentioned the specific family members that each gift on here is for...these gifts are for family members and I do not want your surprise to be ruined!!

FOR ANYONE ELSE: The reason why I have put up this blog is to share my ideas for fun, simple, cheap, easy handmade Christmas gifts. If you are still needing Christmas ideas hopefully you will find some here!

Please let me know what you think and let me know if you found these ideas helpful!! I love to receive comments on my blogs and I love to know when I given useful ideas!

Thursday, December 23, 2010

Aprons

I thought of this cute idea for the kids to do as gifts!


It was very simple.  I got the aprons at JoAnn Fabrics.  I also picked up some fabric paint and some iron on photo paper.  

The first thing I did was put the aprons on the kids and gave them a bowl and spoon and took their picture in the kitchen.


I then printed the photo on the iron on photo paper (following manufacturer directions) and then ironed the picture onto the apron.

I think had the kids use the fabric paint to put handprints on the apron.  I did some other embellishments with the fabric paint as well!


These will go perfect with our homemade potholders.

Friday, December 17, 2010

Christmas Reindeer Snacks

Do you have a child's party that you are still needing snacks for? Or maybe you are having a gathering at your house where children will be present and need a fun snack.  Or maybe you are having an adult party and need a fun snack!!  

These cute little reindeer snacks would be perfect for any Christmas gathering!  And they are super easy and fast to make!!

Just take a piece of bread and cut the crusts off (or don't, it really doesn't matter).  Spread some peanut butter on your bread square and then add a cherry for the nose, raisins for the eyes, and broken twist pretzels for the antlers.  (I also used a small piece of pretzel to "anchor" the nose to the bread so it doesn't roll off).

These would be fun for any Christmas party!!

(this was also posted at my homeschool blog - trainingupachild.blogspot.com)

Wednesday, December 15, 2010

Cookie Containers

(I can't take full credit for this one but wanted to share anyways!!)

I had already decided that one of the things I wanted the kids to do as Christmas gifts is decorate cookie containers and fill them with homemade cookies.

Well last Friday were actually able to make it to storytime at the library.  This was our first time in WEEKS that we were able to make it! And guess what?!?! The theme for the day was Christmas baking and the craft was decorating cookie containers and then decorating cookies to go in them!!

I thought their idea was so cute!  They had cute colored scrapbooking paper and cottonballs and the kids made santa hats and beards to go on the lid!  Seth did all of his cutting by himself.  Even Alyssa made one!

Of course we have already eaten the cookies that we decorated but we are going to use the containers to fill with homemade cookies to give to family for Christmas!

Here is a picture of that container!  This is a super easy idea and most people probably already have the supplies in their house!  It would be a fun idea for a quick Christmas gift!

Tuesday, December 7, 2010

Homemade Potholders

WARNING FAMILY MEMBERS - if you do not want to ruin your Christmas surprise PLEASE do not view this post any further!!


I came up with this idea to have my kids show off their drawing skills :-)  We made homemade potholders!  I got some simple muslin fabric and some fabric markers.  I cut out squares and let them draw away.  (I found it very easy to safety pin the squares to a plastic placemat.  That way the table was protected and they didn't have to worry about the fabric shifting.)

When they were done drawing I added some batting and a bottom layer of fabric and did simple quilting lines. I then binded the edges with quilt binding (or you can also use double fold bias tape).  I wrote their name, date and age on the potholder!

Now loved ones can think of my kids when they are getting hot goodies out of their oven!!

Wednesday, December 1, 2010

Seth's Tic-Tac-Toe Game

Seth has been loving learning how to play tic-tac-toe.  I thought it would be fun to make him a tic-tac-toe game!

This was another felt project - I love working with felt - it is so easy to work with!!

I just took a black square of felt and sewed red rick rack to make the game board.  I then cut out x's and o's from red and white felt.

On the back I sewed two rectangles of felt to make pockets to keep the game pieces in.

I then added snaps and rick rack handles so that you can close it up and carry it with you!

I sure hope Seth enjoys pulling this out of his stocking!

Alyssa's Bear

I made a bear from one of Alyssa's baby blankets!!

The tutorial I got did not have clear instructions at all and it ended up being quite a struggle and the feet have got this curve in them that I don't think they are suppose to have but I think overall it turned out very cute!  It is very soft and very snuggly - and a lot bigger than I thought it was going to be :-)

I think Alyssa is going to love it - club feet and all :-)  (my hubby said it looks like the bear has club feet...oh well)


Mr Potato Heads

A little while back I saw a tutorial for making a felt Mr Potato Head that I thought really cute.  When our kids saw the Toy Story movies just a few weeks back and fell in love with them I thought these would be cute to make them for Christmas.  When I went searching for the tutorial I found out that Hasbro asked that blog to remove the tutorial.

But I realized that I could figure out how to make these without a tutorial...it couldn't be that hard, now could it?!?

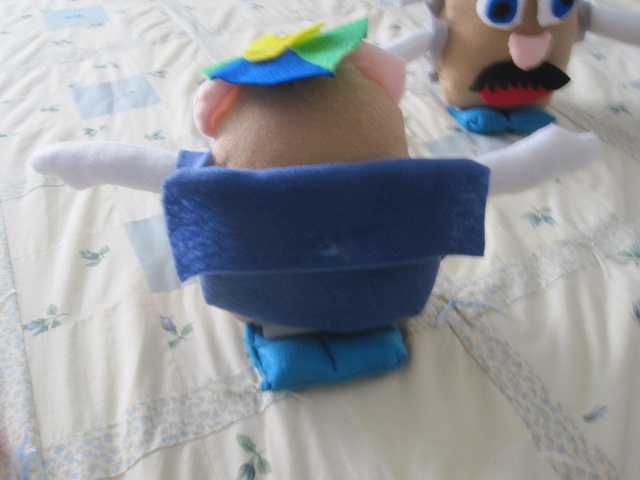
I thought the results turned out to be really cute!  Don't you agree??


I was trying to make them with the pocket for all of the items attached to the back but I wasn't using my brain and didn't think to leave some give in that piece of fabric so that I would have room in the pocket to put things (so if you try this yourself then don't make your pocket peices the same size as your other body pieces.  It needs to be slightly larger so there is room in the pocket)

Thankfully my mom had the idea to make a backpack to put the items in!  (I actually did this project at her house on black Friday!)


Here are all of the pieces.

I hope my boys love these!  I know I sure do!!